Subspace Communications

User Manual: Sound Adjustments


 Interface

Starting a Host

 Connecting

Adjusting 

Channels 


The Adjustment screen allows you to modify a few basic settings, and the Mixer... button allows you to access the computer system's master settings.

Volume
is a percentage of the maximum volume. If the volume is to low you 
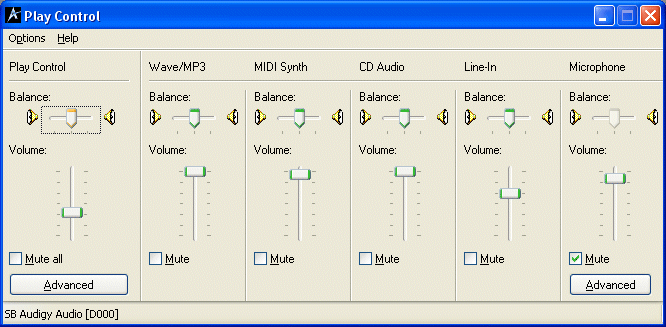
must adjust it by adjusting your master settings from the Mixer window.

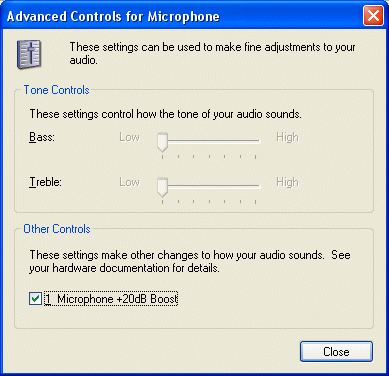
The Microphone Adjustment section allows you to modify the characteristics of your microphone. Checking the Adjust Gain checkbox will allow the system to automatically adjust the gain from the next voice sample. There's a trick to it though, you won't hear the results from the gain until the next voice sample. Once you've set the automatic adjustment, you can fine-tune the microphone recording volume by moving the slider left to decrease the volume, or increase the volume by sliding it to the right. These settings are for the day-to-day adjustments of moving the microphone around.

NOTE: The distance between the microphone and your mouth makes a huge difference in quality. Try to position the microphone as close as possible for the best sound quality. The Adjust Gain will try to compensate if your microphone is to far away. But, if the distance is to far or to close you'll hear an impact in the quality.

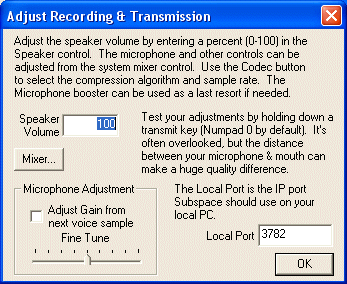
The Local Port allows you to set what port on your computer you want Subspace to use. Be sure to set the NAT in your router if you have multiple computers on your network connection and are accessing outside computers through a NAT.

You can test your settings by holding down the hot key (by default it's the zero on the keypad). You'll hear two short beeps which indicate you're in record mode. Keep holding the hot key down and record a voice sample. When you release the key you'll hear a burst of static and then your recording will play back. Note that while in adjustment dialog, none of you recordings will be transmitted to any players regardless of which hot key you use. Instead, they'll be played back just as the remote listeners would hear them.

Mixer...

The Mixer button launches the mixer window for the system as shown below.

By default the mixer window shows the output controls and the title of the dialog is Play Control. These settings allow you to change the base settings for the entire system. Use the other controls mentioned above to fine tune the Subspace Communication application.

NOTE: The Microphone normally appears in the Play Control dialog as shown above. The Mute checkbox should be checked as shown. If it is not checked, the microphone will always be active regardless of the state of the hotkey. Be careful with this as the sound generated by the speakers can quickly be picked up by the microphone and generate a feedback loop that might be damaging to your equipment.

To get to the recording volume level adjustment, you need to get to the recording controls. You can do this by clicking Options on the menubar and selecting Properties. The Properties dialog to the right will pop up. Select the Recording radio button and ensure the Microphone checkbox is check as shown to the right. The other check boxes allow you to modify other recording settings.

Then click OK and the dialog below will appear. This dialog allows you to adjust the microphone input volume by moving the slider up and down (the top is the highest volume). The left/right slider at the top is the balance setting for stereo microphones. Note that the Select checkbox should be checked.


Notice the Advance button at the Bottom of the microphone column? You may not have this, but some advanced sound cards have built in gain that can really improve the sound quality. To take advantage of this check the checkbox that reads “Microphone +20dB Boost” if your soundcard supports it (you'll need to rerun the autogain after setting this) as shown to the right.

Before leaving the Recording Control dialog test your voice quality by holding the hotkey down and talking. Adjust the slider to where your voice sounds the best.

Remember that the Mixer screens affect the entire system. You should only make this change once after setup or after changing your microphone or other hardware as needed.


Note: If the recording volume is too quiet, click the Advanced button on the Record Control dialog to increase the gain as shown below. Not all sound cards support this feature!


Rainbow's Edge